When I purchased this simple cottage my wheels started turning as soon as I walked in the door. I could see my new life here and it started in what I considered the heart of the home, the cottage kitchen.
I jumped online and started researching new cabinets, counters, flooring and backsplash options. My heart sank when I realized there would be none of this. I settled on the fact I would likely be living with this dated kitchen with painted counters and heavy duty stickers comprising the backsplash for years to come. I have to hand it to the former owners for trying. They completed so many other incredibly important upgrades but I suspect a new kitchen was way out of their budget as well.
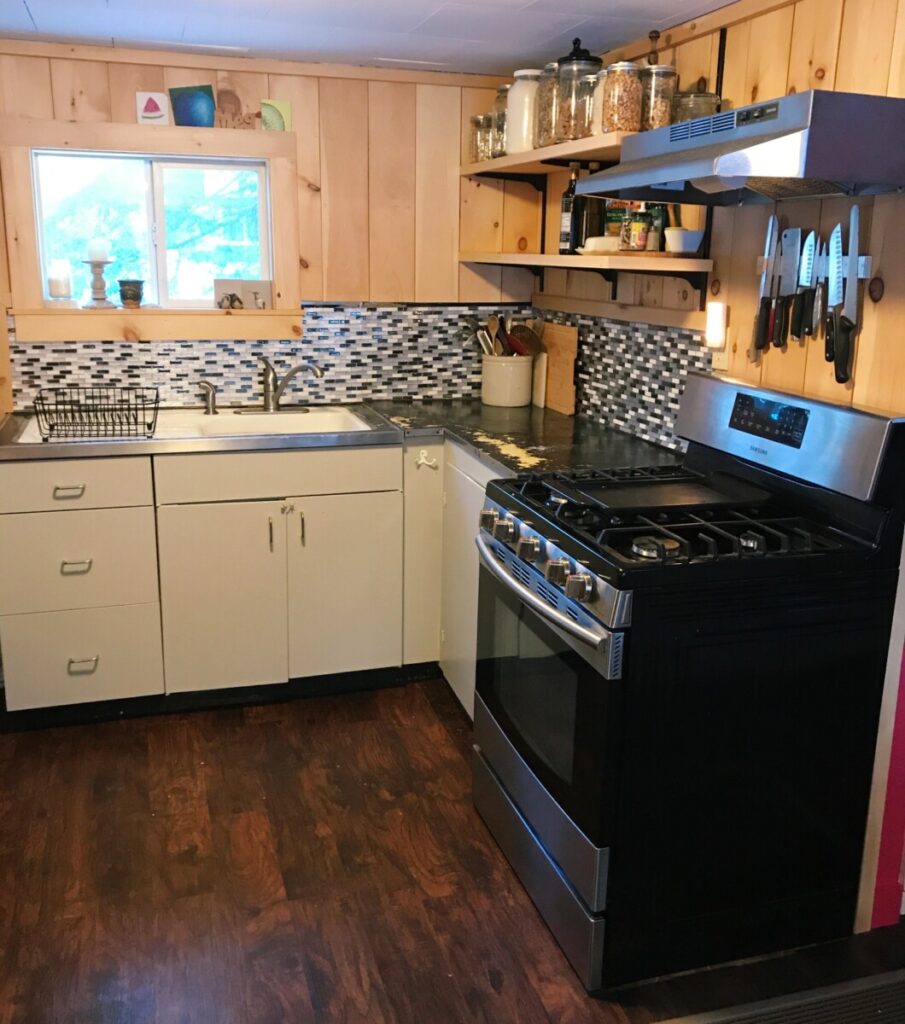
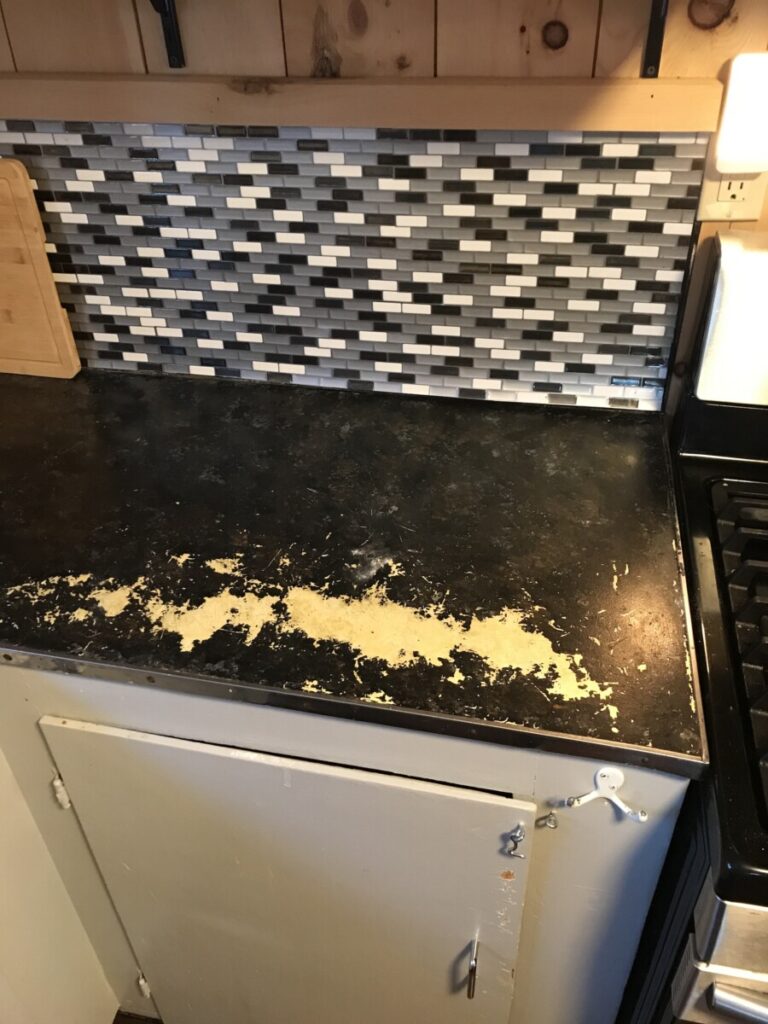
I cook a lot. I may live alone these days but I still make most things from scratch. Cooking is a great creative outlet for me. I love discovering new techniques and revisiting old ones. As I started to try and settle into the new cottage I found myself avoiding the kitchen. I was eating more ready to go foods, ordering pizza and putting off creating a sourdough starter. Baking bread was a new skill I truly loved. Avoiding it in my new home was a huge red flag. When I did use the kitchen I would wipe the counter only to find black paint flaking off onto my sponge. Peeks of the original yellow linoleum counters from the 1950s started showing through. The counters were so warped that I couldn’t even set a wine glass down for fear it would tip over. It was a heart sick time in my new tiny cottage. My mind started working on overdrive to come up with a plan. I had to get myself back into the kitchen. There had to be a way within my simple little budget.
The kitchen started to be all I could talk about. I tend to get fixated on house projects. That comes with being a lifelong nester. No matter where I am I like to feel that sense of home around me. With my research I learned that buying new cabinets with the quality I was hoping for was a tall order. I started really looking at the cabinets I had and realized they were built to last. I am guessing they were built by the person who built the cottage back in 1958. 2×4 framing with no evidence of breakdown aside from the cosmetic issues. They were solid! A great place to start.
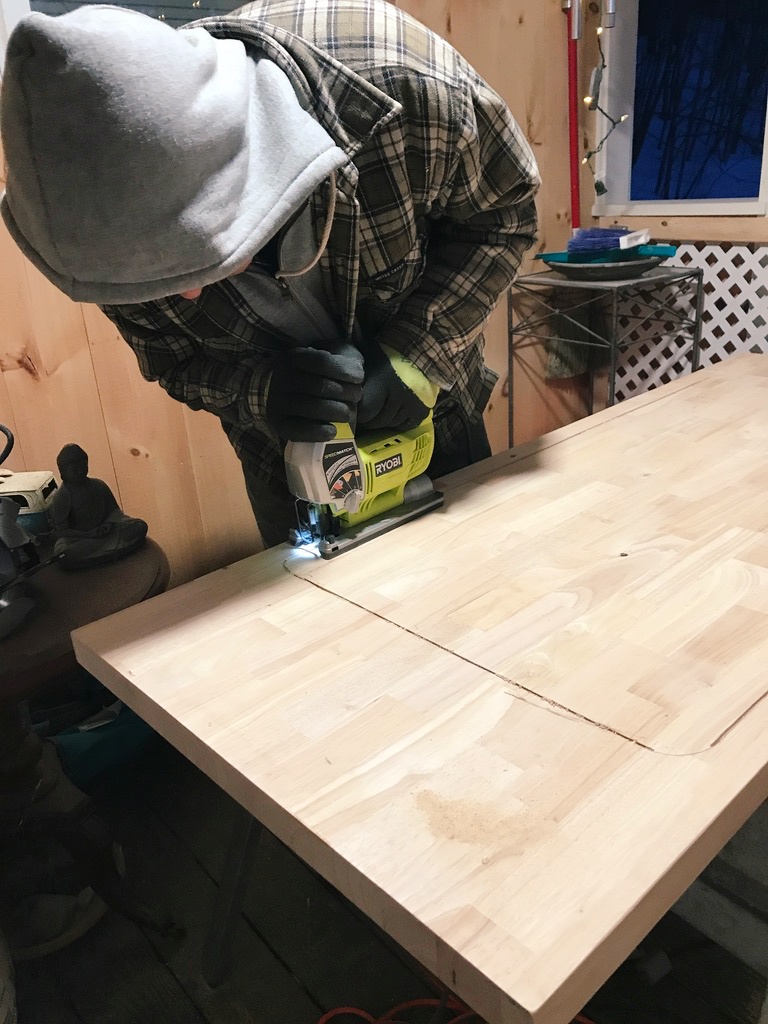
Moving onto the counters and backsplash. They just had to go. When I started looking into the counters of my dreams I was hopeful. Since the space was so small (less than 10 feet in total) it couldn’t be that expensive to get what I wanted, right? Marble, Quartz, soap stone? If I added something beautiful to this solid base cabinets we would be cooking with gas! Another bump in the road of renovation was the sticker shock on those counters. I had to regroup. I remembered a project I designed at another humble home. Butcher Block! The perfect solution that didn’t steal my entire kitchen design budget. I went onto the Home Depot website and purchased a slab of butcher block that would be cut to fit and we were in business. Now I just have to find someone to help me lift and install that hefty beauty.
I started talking with friends about my ideas. My dearest friend, Linda (you remember Linda, right?) is my decorating and design idol. For as long as I can remember I have been drooling over her home interiors. In our 27 year friendship I have always loved watching the way she breaths life into her homes from the Victorian to the Colonial and now to her Vermont mountain farmhouse. Her husband and my friend Mike has always loved home renovation projects. Lucky for Linda he is a brilliant problem solver and loves the process of bringing her designs to life. Whether it is in the barn, gardens or the house there is something Mike built from scratch. I was exited when Mike jumped on board to help with my kitchen project! Lucky for me they had just finished a major renovation on their home so Linda was willing to lend him to me for a while. Time for me to dig in and get the kitchen ready for reworking. Demo was something I could tackle on my own…. mostly.
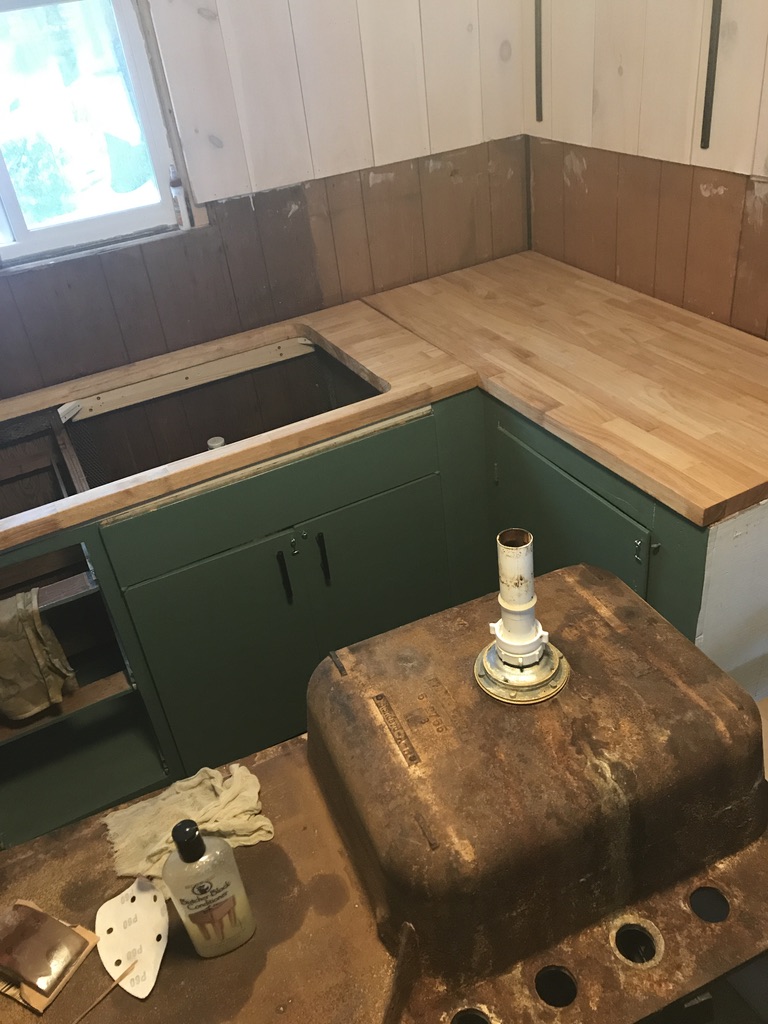
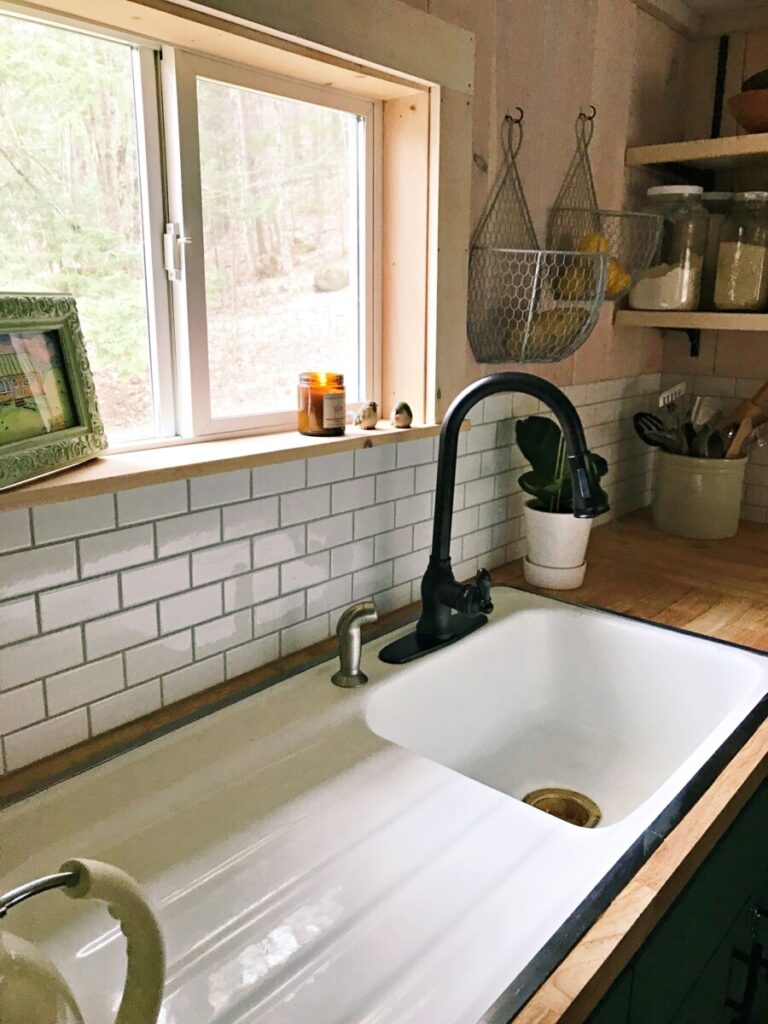
I got out every demo tool I had in my kit. Pry bars, cat paws, hammers, scrapers, and saws. I had to remember that unlike on those TV shows, I wasn’t tearing it all out. I had to be gentle on my cabinets so they could be reused. The most beautiful part of the kitchen was the vintage, drainboard sink which was also to be saved. First I cleared out the cabinets and started on removing the backsplash. I peeled off the tile stickers and breathed a huge sigh oof relief. That was the beginning of my vision coming to life!
Then started lifting off that horrible counter top. I have to say I am a patient worker and I can chip away at something and if I get frustrated I tend to walk away for a while vs. getting frustrated or mad so things went surprisingly smooth. The counter was made of 1/2 inch plywood topped with glued on linoleum and a 1950’s metal edging. Once I pried off the metal edge the pry bar fit underneath and lifted it off without much struggle at all. Even around the sink!
The butcher block counter arrived via Home Depot. The driver kindly left it in the middle of my tiny driveway. There was rain in the forecast so I channeled my days carrying a 9 foot long surfboard and dragged it up on the porch and into the house a little at a time. I didn’t say it was pretty but I got it there. I know I said I was a patient worker but I never said I wouldn’t swear at an inanimate object on occasion. There may have even been a little crying. Remember this butcher block was 10 feet long. The shipping invoice read the weight as 295 pounds. I am 5’4″ and known to be pretty strong. It was all worth it to see the look on Mike’s face the next time he came by to help when he envisioned me getting that thing in the house.
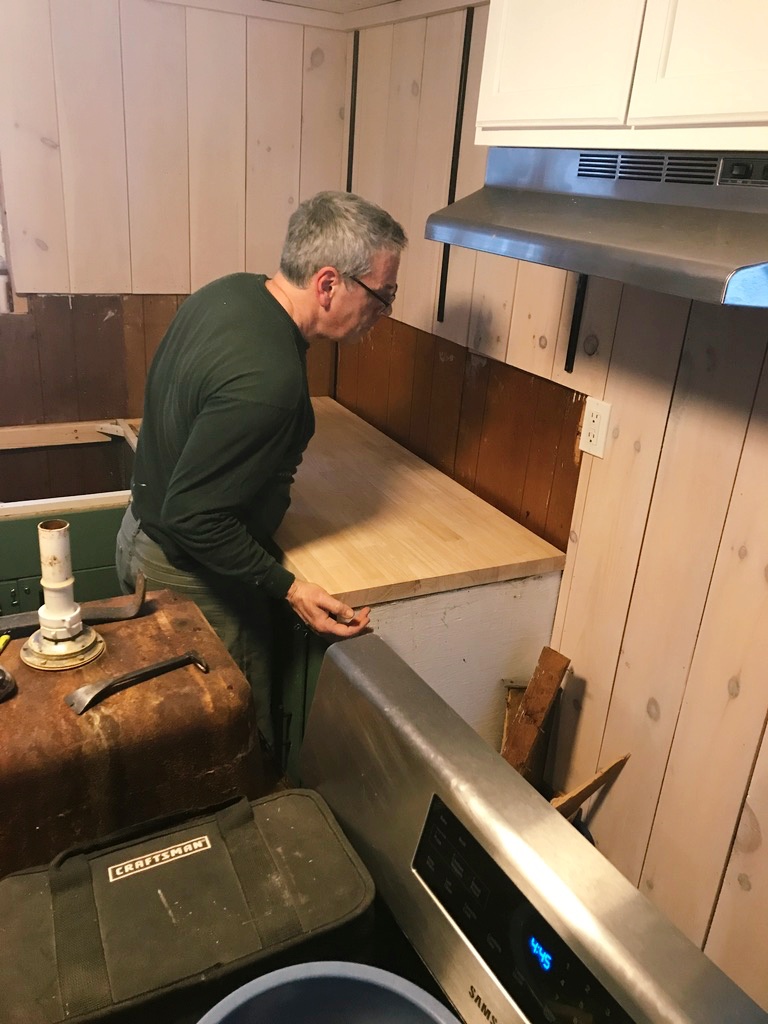
The next phase was the planning and problem solving. Mike and I looked long and hard at those base cabinets. They were in good shape and looking much better after some repair and a coat of paint. We were able to shore them up and add in bracing for the sink and counter tops. We measured that counter a million times before we sunk the skill saw blade down into those beautiful wood grains. Once we laid it in place to check the fit my heart skipped a beat. It was finally looking like the kitchen I envisioned. My kitchen! I could already smell the bread baking.
The next challenge was fitting the vintage sink into the counter and supporting its hefty weight so it didn’t end up in the basement. I ordered some sink clips from a company that made attachments for vintage sinks with a Hoodie ring. That is the metal ring that you see around most vintage sinks from the 1950’s. I spent time emailing with the company and researching online but when the clips arrived they just wouldn’t work. It was quite possibly massive operator (or DIYer) error but we abandoned the sink clips and began using salvaged mahogany we found in the shed to attach the sink to the counter. Another great feature of the cabinets was the framing and where it landed to also offer support to the heavy sink. We got it all secured and it only took 4 of us to flip over the sink and counter section back in place. With the addition of some joint bolts at the counter seam my butcher block was secured.
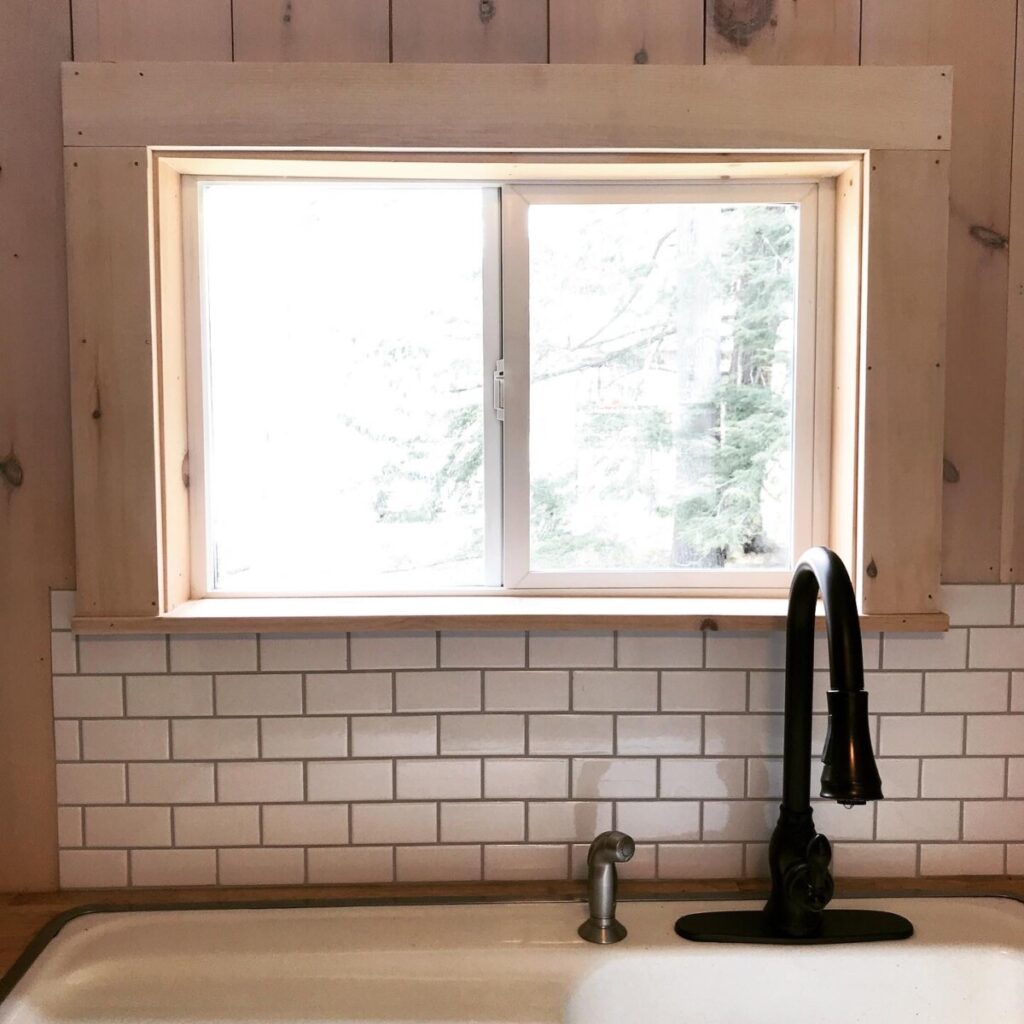
The next challenge was the backsplash. I toyed with the idea of learning to tile. The challenging part was making the tile meet up with the counter and the bottom of the pine board wall covering. Needless to say it was not at all even and was going to need some finesse. I felt the best thing to do was contact a professional so I wasn’t staring at the imperfections that would inevitably be front and center if I completed the project myself. I am realizing I’ve had many Mike’s in my life over the years. Another friend, Mike the tile guy was incredibly patient and explained the process as he went because he could see I was eager to learn. He even allowed me to video his work for the blog!
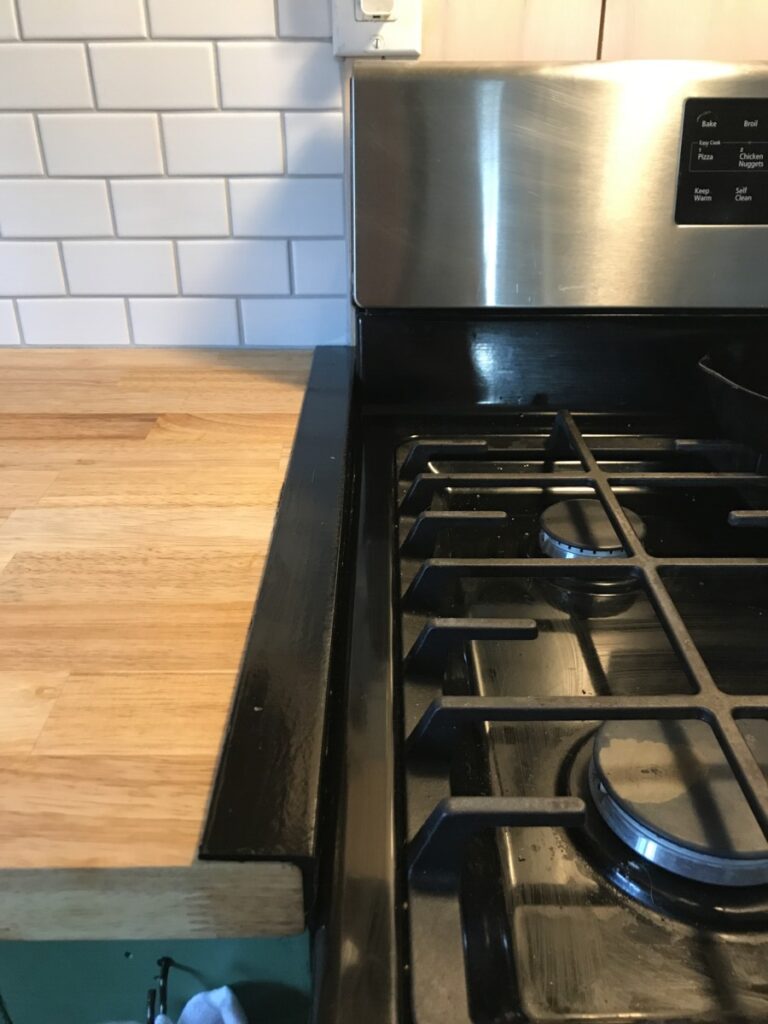
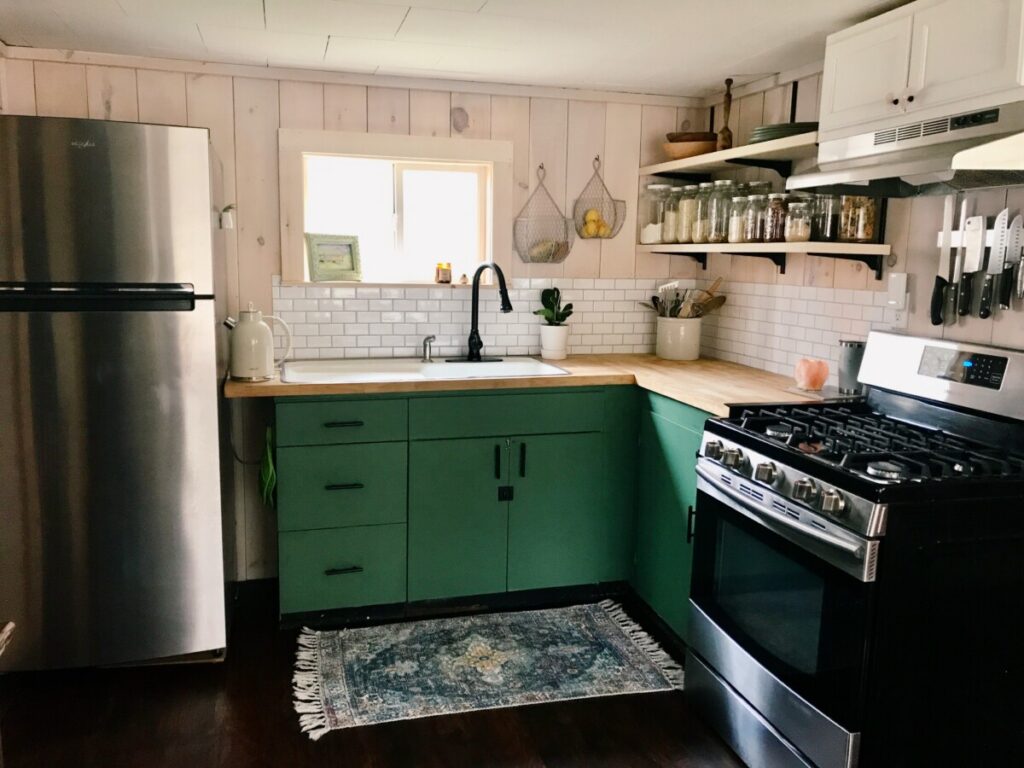
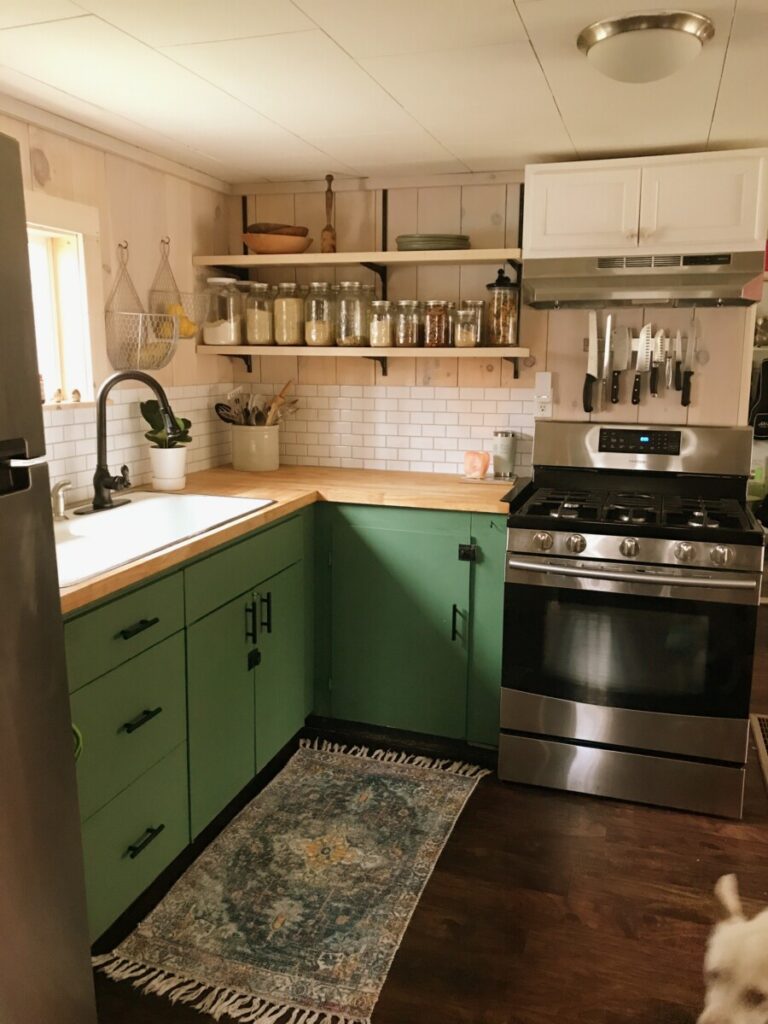
A few more details like trim around the window, adding a small cabinet over the vent hood, and a metal corner piece to cover the end of the butcher block near the stove so I didn’t catch it on fire when cooking were all that needed finishing. Let the styling begin!
Some of my favorite details are the mason jars for food storage on the open shelving, rose quartz pulls on the upper cabinet for a little conversation starter and wire baskets for produce so I can see what I have to inspire my next meal. There are some details left too perfect but overall I am incredibly happy in my new kitchen. What do you like about this kitchen renovation?
Stay tuned for some more juicy renovation blog posts. I am also going to color outside of the lines of my usual themes to talk about some challenges I faced over the last year. This simple cottage has truly been a life saver for me. I hope you don’t mind if I share a personal story in my next post before returning to our regularly scheduled home renovation content.
Happy Nesting!
Love Melissa Dee