A GIFTED BARN DOOR
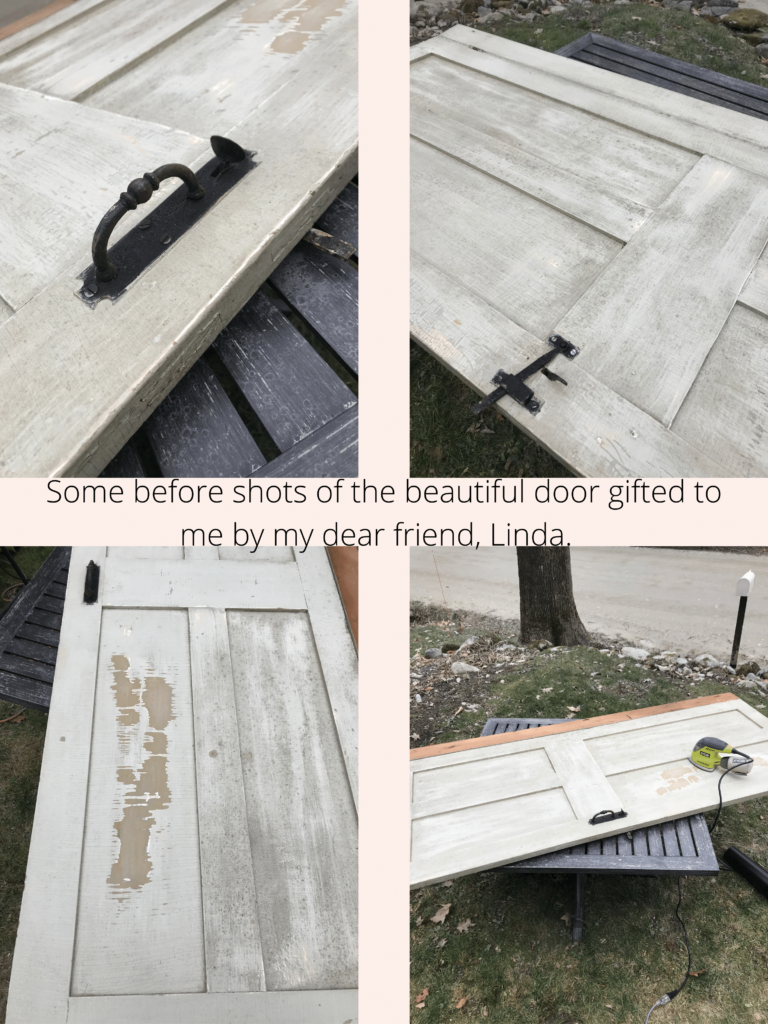
My friend Linda is an amazing decorator. She has an eye for detail and whimsy like no one I’ve ever known. Her home is full of class and elegance but is not fussy at all. Everything has its place yet there is a casual feel. Linda also is great at collecting items she thinks may be of use later on. A stack of slate roof tiles, an old granite post, or even lichen-covered rocks. I have seen Linda and her husband, Mike transform items like these into beautiful, magazine-worthy home decor. When I bought the cottage Linda brought me out into her barn to show me an antique barn door she thought I might like. It had black iron hardware still in place and gorgeous lines. I just couldn’t resist channeling her inner interior designer to make barn door hardware she’d be proud of. I’ve always wanted a vintage barn door! Here we go!
THE TINY COTTAGE, LOW CELING DELIMA
When I saw the door I could visualize it separating my mudroom from my kitchen. It would be a great way to hide away the mess of Vermont life. I jumped online and found a plethora of beautiful barn door tracks. I just loved the idea of vintage, black track and rollers holding up the rustic door. Something in my gut told me that none of the tracks would work. You see, my ceilings are super low. I looked at the clearance specifications on so many barn door tracks. The closest I could find needed 5 inches or more from the top of the door to the top of the rollers. I only had 3 and a half inches to work with. I jumped onto Pinterest for more inspiration from other people like me makin’ somethin’ outta’ nuthin’.
Pinterest INSPIRATION AND MODIFICATION
I am always blown away by the ideas and inspiration available on Pinterest. I’m never afraid to dig deep to accomplish what I want with a bit of effort and minimal expense. I typed in ‘DIY barn door hardware’ and scanned the pictures for what looked like simple, low profile options. I used a few of the ideas I found and modified them a bit further to suit my needs. Off and running!
PREPPING and PLANNING
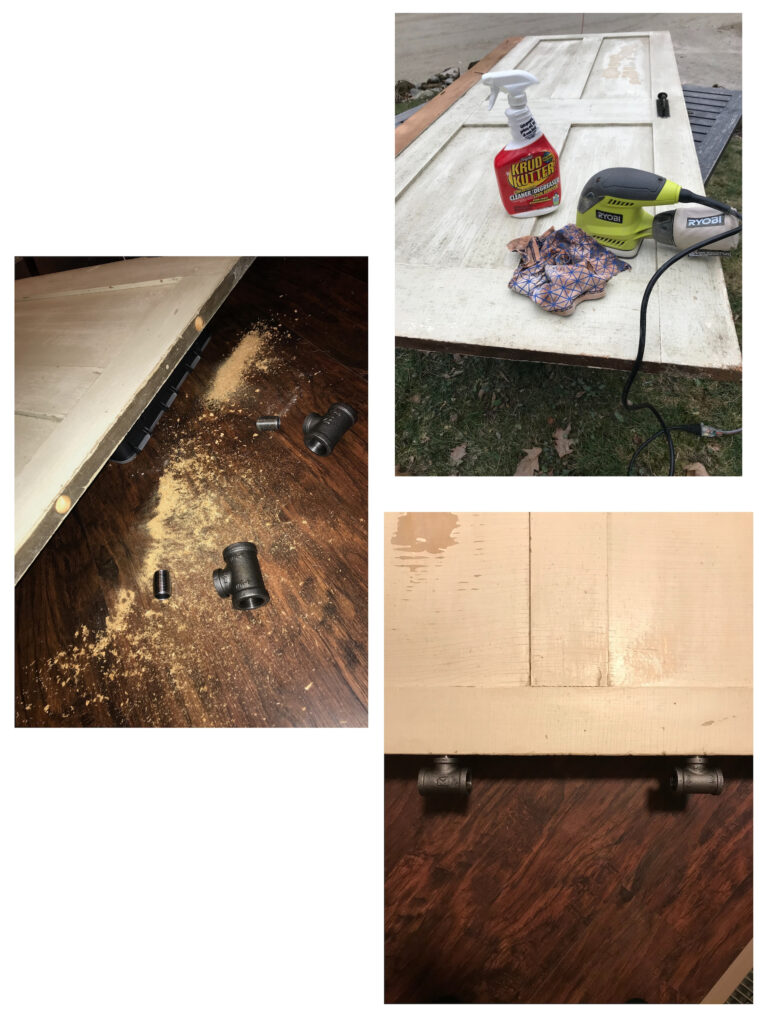
I scraped and sanded the door of all chipping paint. Some of the rough paint texture was left behind and that was fine with me. This is a great way to keep some vintage charm and decrease the work of stripping the door down to bare wood. I am definitely not a fussy project person. I love that lived-in look. It worked like a dream! I used my Ryobi mouse sander, my shop vac, and a bit of hand sanding. Next, I used a damp cloth sprayed with a bit of Krud Kutter to make sure my fresh layers of paint would stick without fail. I am a bit of a messy painter. I did tape off the antique hardware, but I still have some cleaning to do in a few spots.
INSTALLATION
Once the prep was finished I started installing the barn door hardware components. The top of the door needed to be drilled with a paddle bit to accept the pipe nipples to secure the Tees that would slide along the pipe track. I read a few articles about old wooden doors being brittle and prone to cracking so I was super careful on this step. I found a paddle bit with the help of my local Aubuchon Hardware Store. The salesman was so kind as to listen to my crazy project idea without batting an eye and helped me match a bit to the diameter of the threaded hardware I brought in for reference. I bought glue to secure the hardware in the drilled door but didn’t end up needing it at all. Props to that hardware guy again for helping pick the perfect size paddle bit.
Installing the door track became a bit of a puzzle. I had to pause several times to make sure I was putting the parts together in an order that made sense.
- Secure the flanges to the threaded end of the iron 90–degree elbow.
- Thread the 6-foot pipe through the tee pipe fittings along the top of the door.
- Screw one end of the pipe into the elbow.
- Screw the flange on this end to the wall using wall anchors as needed.
- Level the 6-foot pipe and attach the other elbow to the remaining end of the pipe.
- Screw the second flange into the wall using wall anchors as needed.
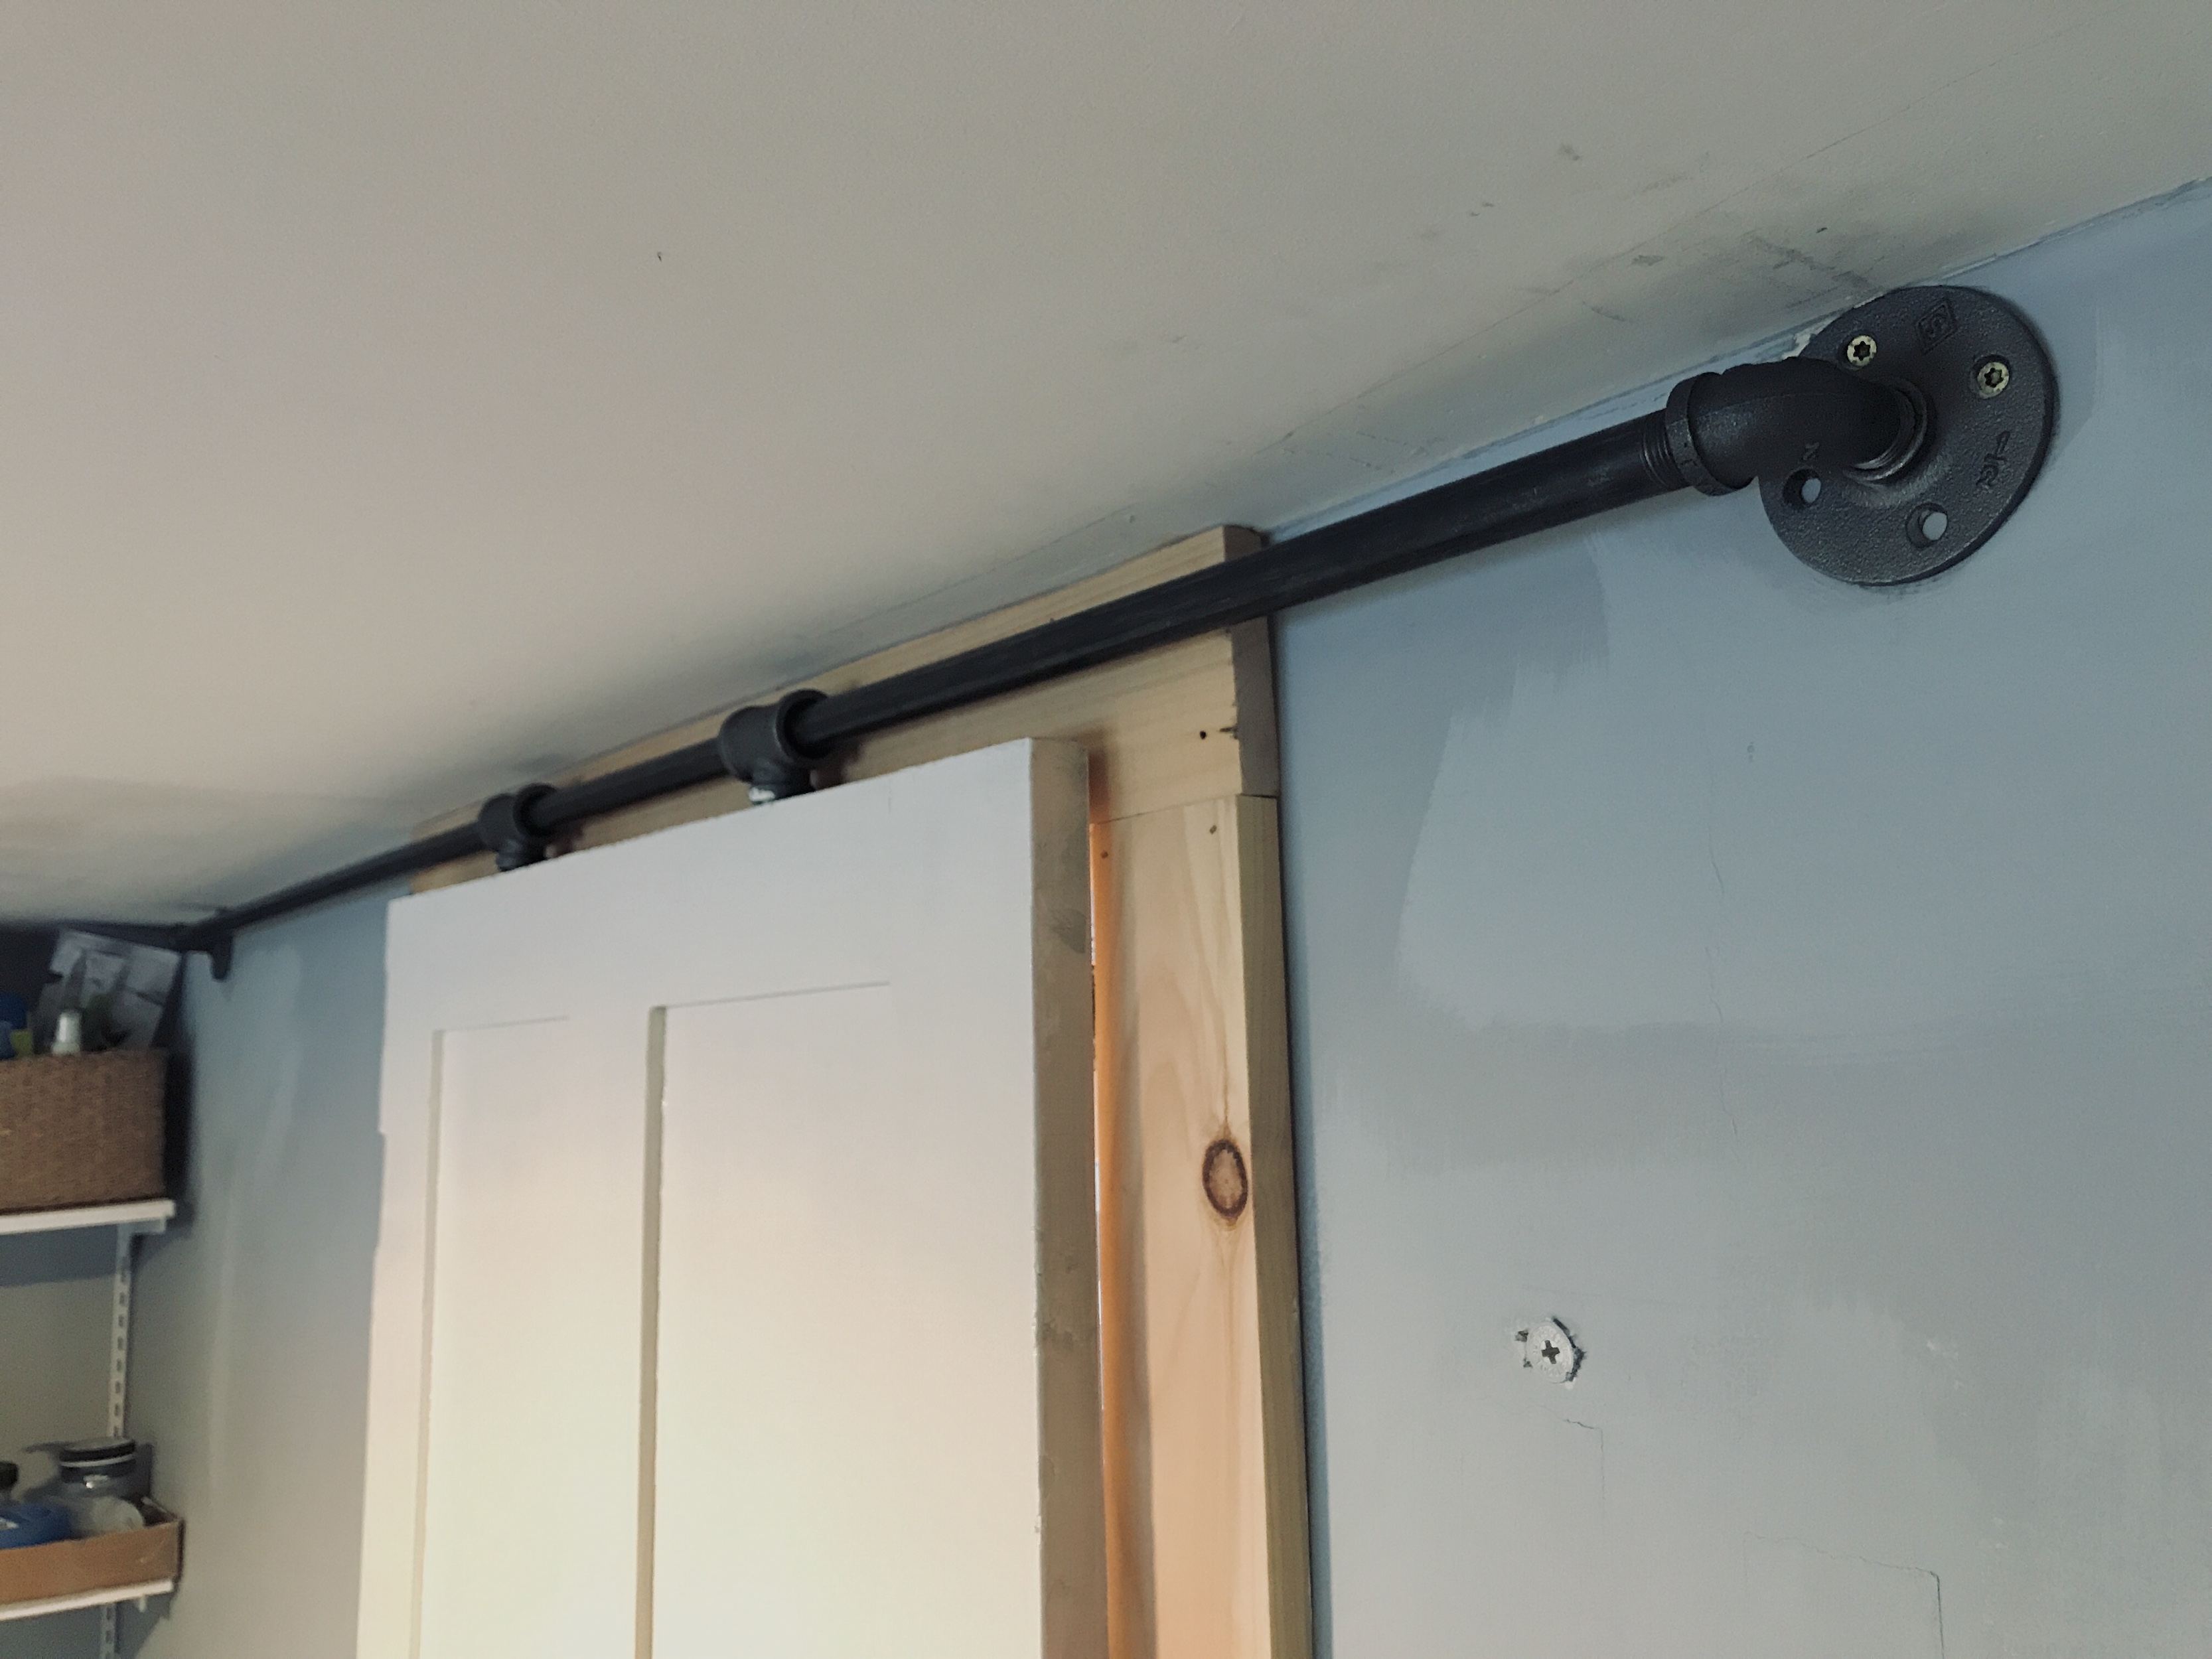
Because my installation occurred at the very top of my wall I was able to avoid using wall anchors. I was able to screw the flanges directly into the top plate of my wall. If you can match up your flanges to studs that is ideal. I used cabinet screws for securing the track to the wall.
Final Touches
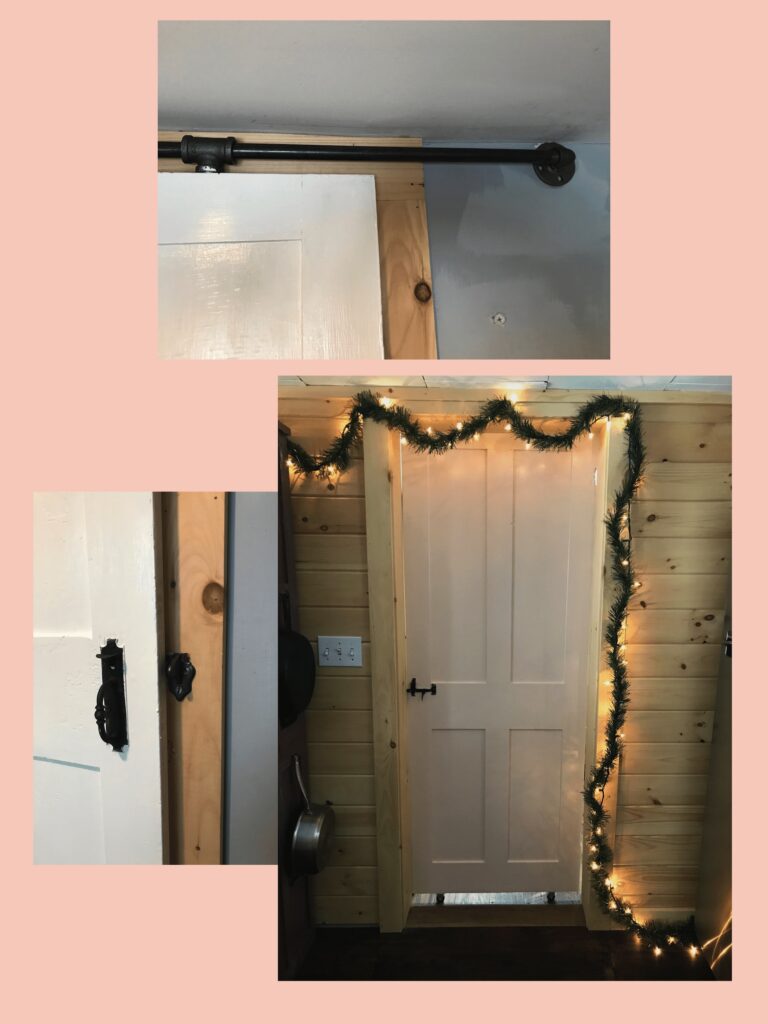
Once the door was in place I realized I was missing an important piece of hardware. The door needed a catch for the thumb latch to make sure it would hold in place when closed. I had to make sure my adorable, yet somewhat ill-mannered dogs could be held back while I greeted company or came in from a long day at work. I called around to hardware stores and no one seemed to have what I needed. The local Architectural Salvage places were closed due to COVID and hadn’t responded to emails. I took a look around on eBay and in my first search was able to track down the perfect item. I ordered a vintage ‘Barn Door Iron Thumb Latch Drop Bar Strike Hardware’ and had it within a week.
The kitchen side of the door I painted sea salt pink to match all of my exterior doors. I painted the mudroom side of the door cloud white so it will remain a blank canvas for my next dreamy mudroom project. Stay tuned for a total makeover to the mudroom complete with funky wallpaper and a new pantry. All the parts are together and the door works great. I plan to add a bit of trim to the door to close up some of the gaps but that will come later. I will be sure to add any updates as they happen.
Well, it isn’t perfect by any means but it was fun, for sure. Linda was pretty happy with my ingenuity. I love finding inventive ways to add charm and whimsy to a home. My home… that means I can try the ideas floating around in my head and if they work, great! If they don’t, well nothing is lost when you learn from your mistakes. ~ xo, Melissa
It came out great! Love the instructions you’ve added here to make it easier for a reader to do something similar. Were you able to find a work-around for the friction when sliding the door?
Thanks!! I realized the 6 foot pipe was not quite level so once I fixed it the friction was fixed! Still imperfect but a cool use of the door nonetheless. Xo
Melissa, I LOVE this!! I am putting a barn door on my bathroom. Can you PM me the link to the rod and rollers you used?
I’m so glad you liked it! Awesome idea for your bathroom! I linked the hardware I used in the list section. Shoot me a message if you have any trouble finding them. Can’t wait to see your finished project.